RentalPoint3 can be configured to connect with your subscription to DocuSign, in order to request and receive digital signatures from clients when requesting quotes, booking hardcopies, etc. DocuSign is a third-party application, and a subscription is necessary to use this functionality.
 Alternatively, RentalPoint Electronic Signature functionality is also available using RPSign (no third party software needed)
Using DocuSign in RentalPoint3
Producing your Document
Once RentalPoint3 is configured to use DocuSign, use any template that already has the docusign fields included OR add the necessary fields to your custom templates before proceeding
Fast Reports
For standard templates (i.e. included with RentalPoint3), display your Fast Report with 'Print Standard Rental Terms' Checked
Save your quote


Then use the  option to request an electronic signature
Choose One email address to send your document to

You may be required to log into your DocuSign account, once your password is confirmed, you'll get a confirmation status for your sent document.

RTF Templates
Using Print-->Custom [Quote, Proposal,Confirmation] option

Then review and re-load your modified template using the Next option

Once reloaded, click Send for DocuSign


What your customer will see
The client will see an email from DocuSign requesting a signature, they will follow some simple instructions to sign the document. Once they click FINISH, the signed document is returned to you!


Click Continue, then click Start

Click the Sign box to adopt a signature


The signature is used and name automatically printed. Click Finish to complete


Receiving Your Signed Documentation
You'll receive a return email once the document has been signed


You can download and attach the signed document to your booking and/or a certificate of completion
- Combined PDF will download a PDF of the signed document and a signature certificate in one PDF
- Separate PDFs will zip two separate PDFs and download one Zip file


Highlight the booking, the click on View Attachments

E-Signature Documents
See all e-signature documents under the Action Lists menu option
Fig 1.1
1. Use the  option to filter between RPSign and DocuSign documents

2. Access other menu options via  including opening the DocuSign envelope to review directly in your DocuSign account.

3. Use the Search option on the far right of the window to search for a particular booking (fig 1.1 above)
4. Open/Print booking details
5. Identifies the type of e-signature requested i.e. DocuSign or RPSign
Configure RentalPoint3 DocuSign Integration
1. DocuSign Subscription
You'll need a subscription to DocuSign. If you already have one, then skip to 'App Integration Key' below.
 DocuSign free trial does not support setup of API Keys so you can't test the RentalPoint/DocuSign Integration with it. To test the integration before purchasing a subscription, you'll need to use a <Developer Sandbox demo account> OR look for a DocuSign subscription, then use the settings under App Integration Key below to complete your demo account setup.
DocuSign Envelopes
- For DocuSign, you would need a subscription for each email that will be used to send envelopes for signing.
The type of subscription would depend on the number of envelopes you anticipate sending out per month and the number of emails those envelopes would be sent from. - Envelopes Defined: In DocuSign, an envelope is a container for documents that you send to a recipient to sign. An envelope can have one document or many documents, and one signer or many signers. Envelopes have statuses (i.e. sent, delivered, completed, voided) and also contain information about the sender and timestamps that indicate the progress of the delivery procedure. Regardless of how many documents, fields, and signers a given envelope contains, it still counts only once towards your eSignature plan’s envelope allowance once it is sent out to be signed.
- DocuSign have a range of options available including advanced solitons that can be customized to your company requirements. <DocuSign Subscriptions and Pricing>
2. Set up a DocuSign App Integration Key
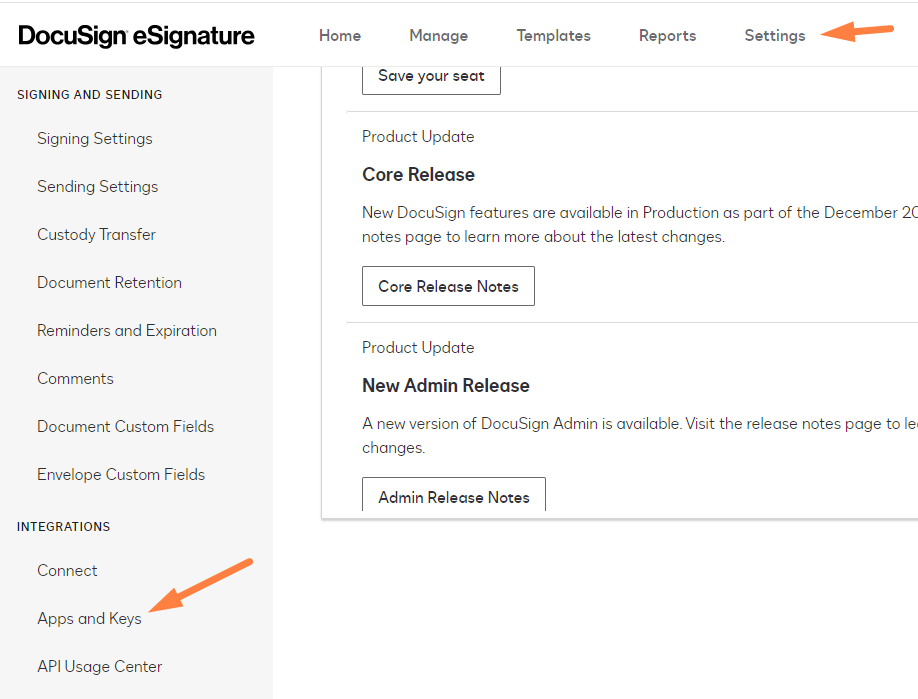
From your DocuSign Production account, click on Settings, then APIs and Keys
DocuSign requires that you set up a new App Integration Key in a developer account so that it can be validated before it can 'Go Live' in production, so click the developer account link to go there
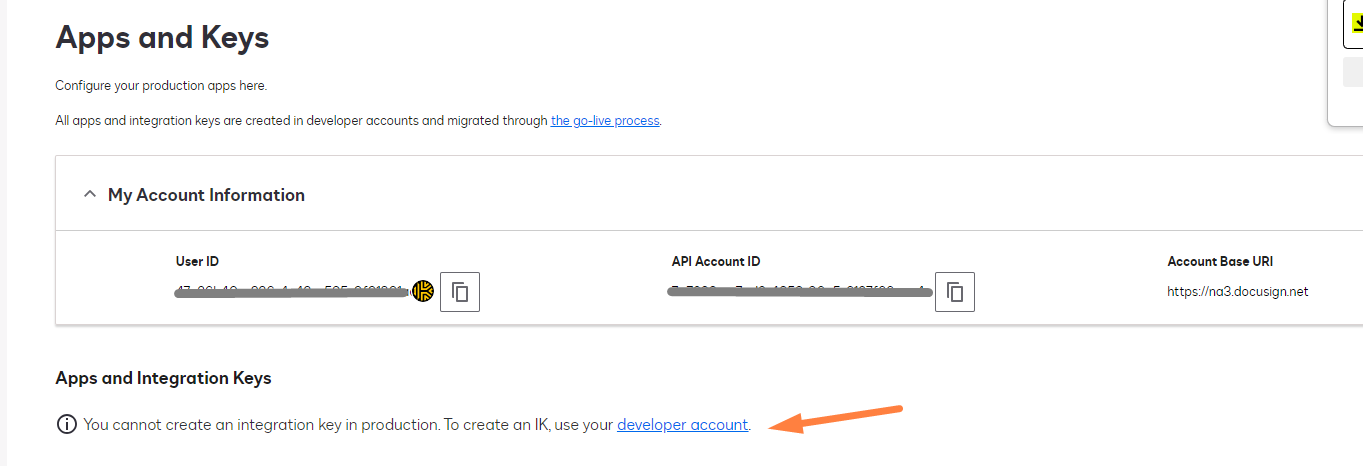
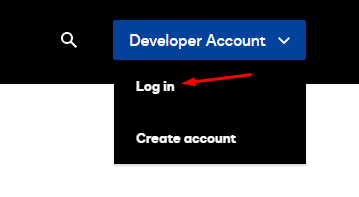
If you don't have a developer account, you can create one here or log into your existing developer account
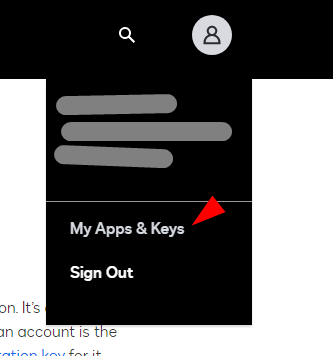
Goto My APIs and Keys
Click on 'ADD APP/ INTEGRATION KEY'

Enter a name and click ADD

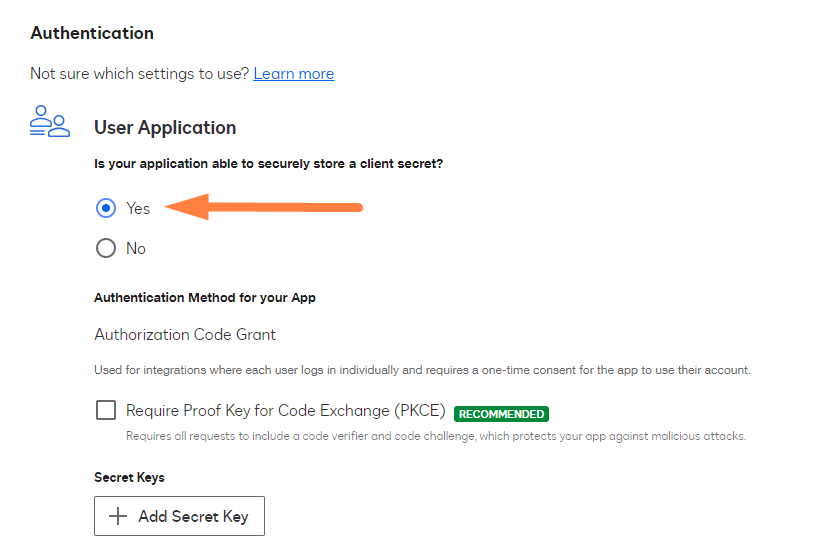
Under Authentication, select YES for User Application
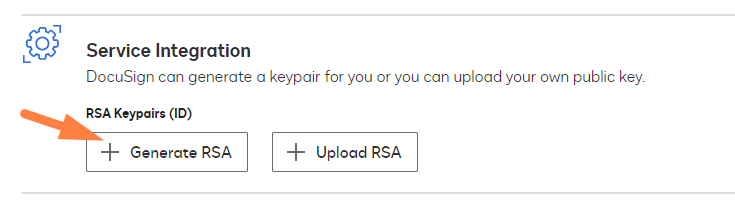
Generate an RSA
Create a Notepad txt file using the name docusign.key , then use the copy buttons to copy the private key and paste it to the file

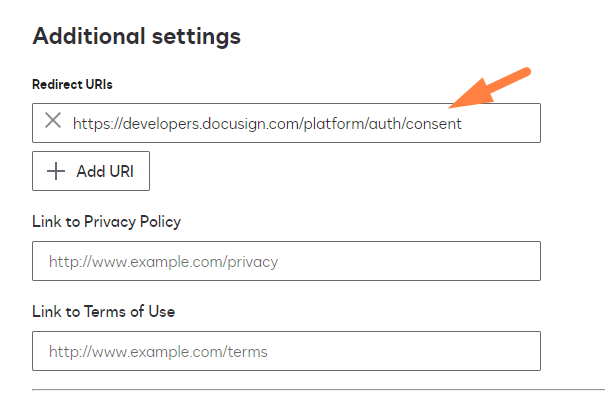
Under Additional Settings click Add URl , then in the box that appears enter the following URL
https://developers.docusign.com/platform/auth/consent
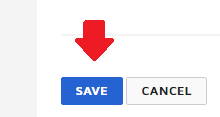
Scroll to the bottom of the page and click SAVE
Email your docusign.key file to support@rentp.com so that it can be uploaded to your account. This step must be completed before you can expect to integrate with DocuSign

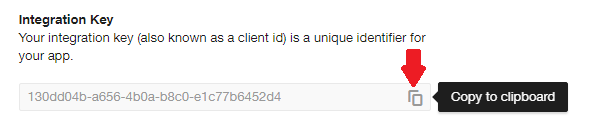
The Integration Key will now display in the list, click on the key to edit

Copy your Integration Key for use in RentalPoint setup
3. Enabling DocuSign in RentalPoint3
If you don't have a DocuSign account, see instructions above for your options.


With a new App Integration Key, you'll need to send 20 calls before you can 'go live' with a production key. Set your DocuSign Parameter to Developer and paste your Integration Key and User ID into the fields provided.
Enter values for the fields below:
- Development - Use this option if you are testing the DocuSign integration in development before the key is live
- Production - Once your Integration key is live use the Production setting
- DocuSign App Integration Key - use the integration key you set up in the above section
- DocuSign User ID - enter your DocuSign user ID
- The 'Sign place caption' and 'Name place caption' values are what your user will see on the document they are asked to sign. Everytime you change these values, you'll need to re-add the fields to any Fast Report or RTF template in use.Whatever text you use here MUST be reflected exactly the same way to your document in order for the software to detect DocuSign settings when your template is merged.
- Enter the same link you use to run RentalPoint3 with Docusign/DocuSignWebHook appended your link
- Example:
- If the link you use to run RentalPoint is https://mylink.rentalpointsoftware.com:12345/rp3 then you would enter https://mylink.rentalpointsoftware.com:12345/rp3/Docusign/DocuSignWebHook
- Example:

Save and reload your parameter settings.
4. Authorize your Integration Key
DocuSign requires 20 successful API calls (i.e. app integration calls) in Development before they will promote your key to production. This is in effect testing to ensure that you have set up your integration correctly. API calls are made by producing your quote document in RentalPoint and sending it out for signature through DocuSign.
Each time you successfully send a document out for signature via DocuSign, you'll see the 'Go Live Status' count change as outlined below.
Send for DocuSign using RTF Template
Click on any booking then Print-->Custom using Template and send your document for Signature.
See full details on printing a quote here.


Once you've sent a document for signature 20 times (no need to sign and return), it may take up to 15 mins to see the 'Go Live Status' change.
Click Submit for review and wait for DocuSign to respond.


Once DocuSign replies you're ready to promote your key to production, see steps below.

When your app is promoted into the production environment, its integration key is duplicated into the production environment rather than moved. The integration key's configuration parameters such as secrets and redirect URIs are not also duplicated; you must add them in the production environment to match the settings for you app in the developer environment.
Edit your key in production


Under Authentication, select YES for User Application
Generate an RSA
Create a Notepad txt file using the name docusign.key , then use the copy buttons to copy the private key and paste it to the file
Under Additional Settings click Add URl , then in the box that appears enter the following URL
https://developers.docusign.com/platform/auth/consent
Scroll to the bottom of the page and click SAVE
Email your docusign.key file to support@rentp.com so that it can be uploaded to your account. This step must be completed before you can expect to integrate with DocuSign
Remember to change your RentalPoint Settings to your Production Account for
DocuSign User ID and App Integration Key
Anytime you change the text in your 'Sign place caption' and 'Name place caption',
you must also change the text in your template documents to match.

5. Promote your Integration Key from Developer to Production Mode


RentalPoint3 Fast Report Templates
In RentalPoint3, customdesigner.exe is used to edit your '.fr3' report templates. Digital signature fields should be available on standard quotes using the 'Print Rental Terms' option OR contact support@rentp.com to add the fields to your custom templates.
The text fields added MUST match the text in your parameter settings (see 'enabling DocuSign in RentalPoint' above)
- Text field containing 'Please add your Signature here'
- Text field containing 'Please print your Name here'

RentalPoint3 RTF Templates
The text fields in your RTF template MUST match the text in your parameter settings (see 'enabling DocuSign in RentalPoint' above for full information on Account Settings)


Using Print-->Custom [Quote, Proposal,Confirmation] option
Then review and re-load your modified template using the Next option
Once reloaded, click Send for DocuSign