RentalPoint uses a Treeview Structure (Fig A below) to organize and manage the inventory your company will make available for Rental or Sale. Inventory must be entered here before it can be added to the equipment grid of a booking.
Please take a few minutes to understand the treeview concept above before proceeding with either manual set up from menu items OR import from csv file (both options outlined below.
Access the Product Setup/Management options via the gear icon  on the products menu (Fig B below) or via right click option on the Products page (Fig C below)

Treeview Structure
RentalPoint uses a treeview structure to organize products. There are four main folders (listed below), these folders cannot be renamed or moved, these are the root structures of the tree. You may customize icons for group, category, product within the setup of each record.
- Rental Equipment,
- Sales and Disposables,
- Labour Products,
- Technicians
Within these root structures you can create Groups, Categories, Subcategories, Products and Assets.
 Ensure boxes are checked for all assets you want visible in the Inventory Tree via Filters option at the bottom of the screen

Group
Groups are used to separate large areas of equipment. An example of a group may be Audio, Lighting or Staging.

Create a new Rental group via option when the
  icon is highlighted
Create a new Sales group via option when the  icon is highlighted
Open existing group properties via  option when the existing group is highlighted
Delete an empty group via  option when the empty group is highlighted

Category
A category helps to further split up the main group folder. So within the Audio group, you may want to use categories such as Power Speakers, Microphones or Sound Boards.

Create a new category via option when any existing category is highlighted
Open existing category properties via option when the existing category is highlighted
Delete an empty category via option when the empty category is highlighted

Subcategory
Subcategories can be enabled via Operational Parameter #194. This allows further organization of your categories. So within the Microphone category you may want subcategories of Wired Mics, Wireless Mics or Lapel Mics.
Create a new category via option when any existing category is highlighted
Open existing category properties via option when the existing category is highlighted
Delete an empty category via option when the empty category is highlighted
Product
A product is the information related rental/sales items used on bookings.

Create a new product via option when any existing Product is highlighted
Open existing product properties via option when the existing product is highlighted
Delete a product via option when the existing Product is highlighted (all assets, components, accessories and alternatives must be deleted first before the product can be deleted.)
Duplicate an existing product via  option when the existing product is highlighted

Use the  option to search for an existing Group/Product/Asset per screenshot below

Asset
Assets are the individual items that are sent to a client. You may have five microphones in your warehouse and each has a barcode. You would enter these microphones individually into the Asset folder.

Create a new asset for Rental products via option when any existing Asset is highlighted (or highlight the asset folder)
Open existing asset properties via option when the existing Asset is highlighted
Delete existing assets via option when the existing Asset is highlighted

Link to a tabbed article here

Import from csv
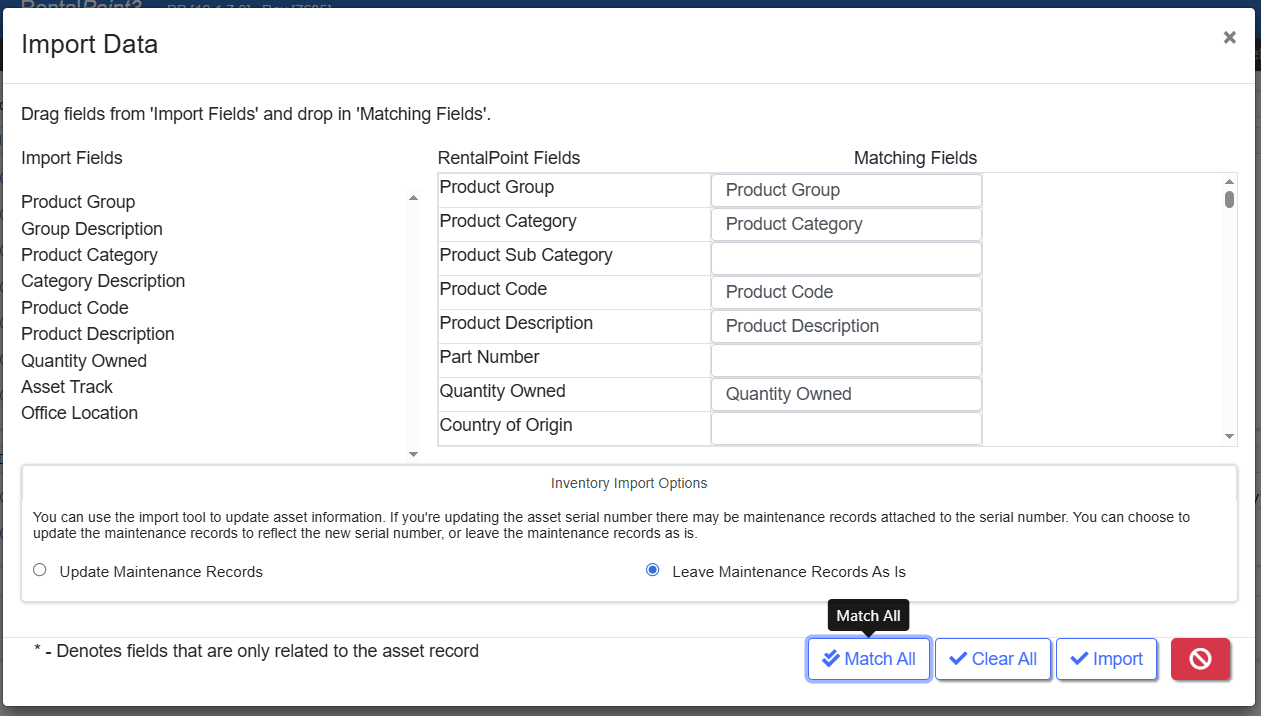
Using the 'Rental Inventory.csv' template you can import Products and their assets using the 'Clear All' 'Match All' functionality in the system. Contact support@rentp.com for this template if needed. You can also save this template as Tab delimited to import a .txt file.
NOTE:
- Any Groups, Categories, Sub Categories that do not already exist in inventory will be created. Any existing Groups, Categories, Sub Categories will be updated.
- All of the fields with an '*' beside them are Asset Fields so the information contained in those fields is stored against the asset record if created.
- When importing a comma delimited file 'csv', do not use commas within any cell of your template in order to ensure the data is imported correctly
Please reach out to support@rentp.com should you require assistance with your import.
Here's what needs to be done.
To complete the spreadsheet:
- See TreeView Structure information for how RentalPoint organizes Inventory.
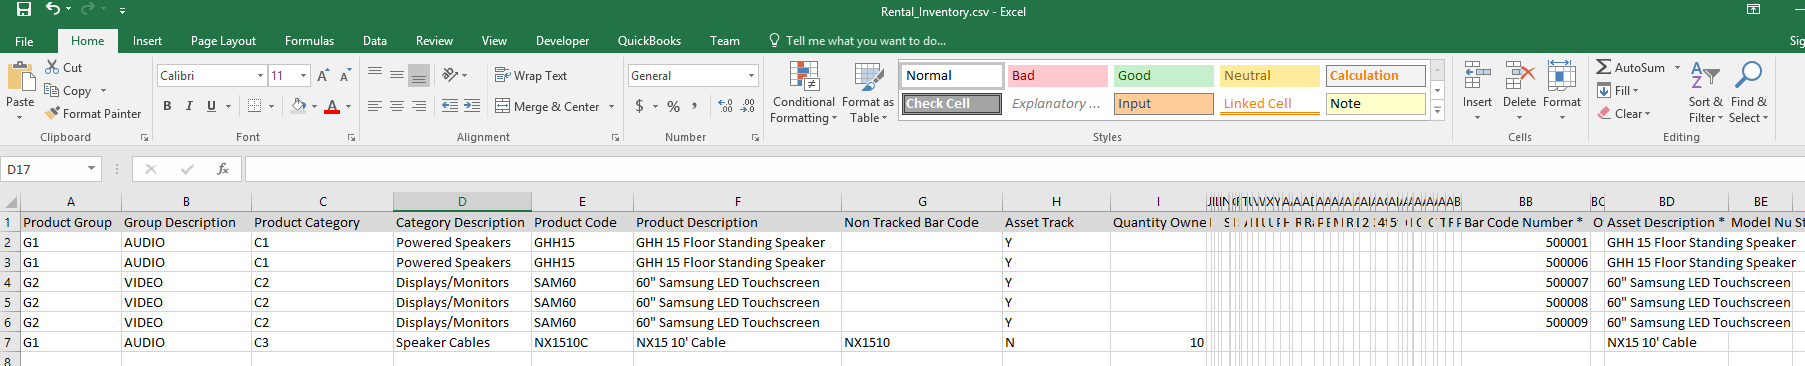
- Complete fields in the spreadsheet, some are required like fields in the screenshot below - the fields do not need to be in any particular order in the import file, I've moved some around for ease of entry. Just keep the names 'as is' for ease of import.
- Line 1 ensures the headings match those expected so that you can use 'clear all' 'match all' when importing
- Using some sample data, I have moved the headings to different positions in the document for easier illustration:
- Lines 2,3 import two assets for the product GHH15
- Asset Track - identifies the product as asset tracked
- Bar Code Number* - uniquely identifies the asset
- All field headings with an '*' like cells BB and BD below are only used for asset records
- Lines 4,5,6 import three assets for product SAM60
- Line 7 imports one NON tracked product with a record of 10 items in stock.
- Asset Track for this item is 'N'
- Non Tracked Bar Code - is optional but allows you to scan cables using a product barcode
- Quantity Owned - denotes qty owned for Non Tracked gear (i.e. where Asset Track = N)
- Lines 2,3 import two assets for the product GHH15
Importing the Spreadsheet:
Ensure Operational Parameter 65 'Use Assets to Calculate Qty' is set to YES. If you have to set it, then log out of RentalPoint and back in again before proceeding. You should only have to do this once.
- 1. While backups are taken of your database nightly, it is advisable to contact support@rentp.com requesting a backup be taken prior to importing data as this operation is not reversible.
- 2. Ensure no users are in Inventory Setup so that they are not interfering with any products you are trying to update
- 3. Import files in RentalPoint
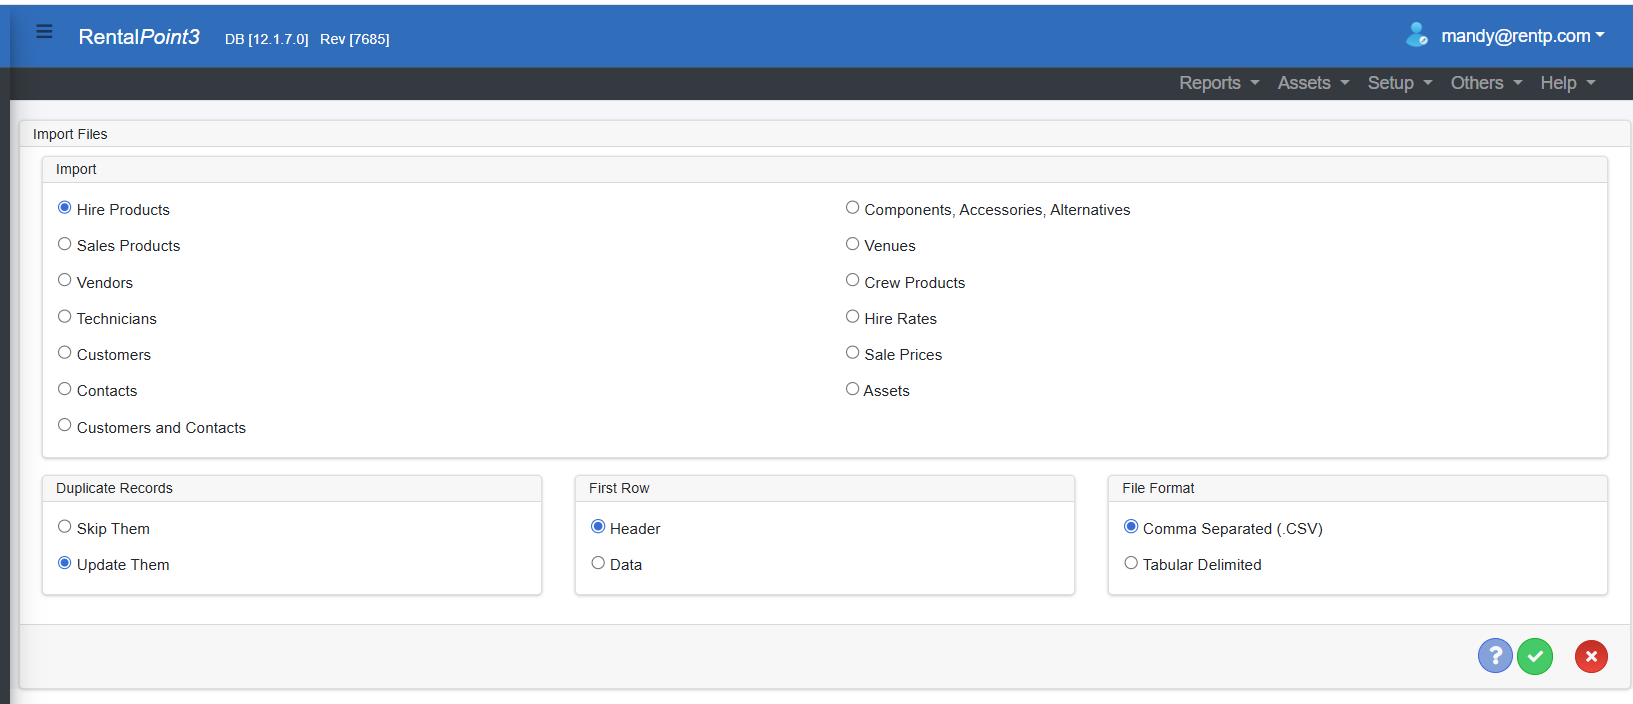


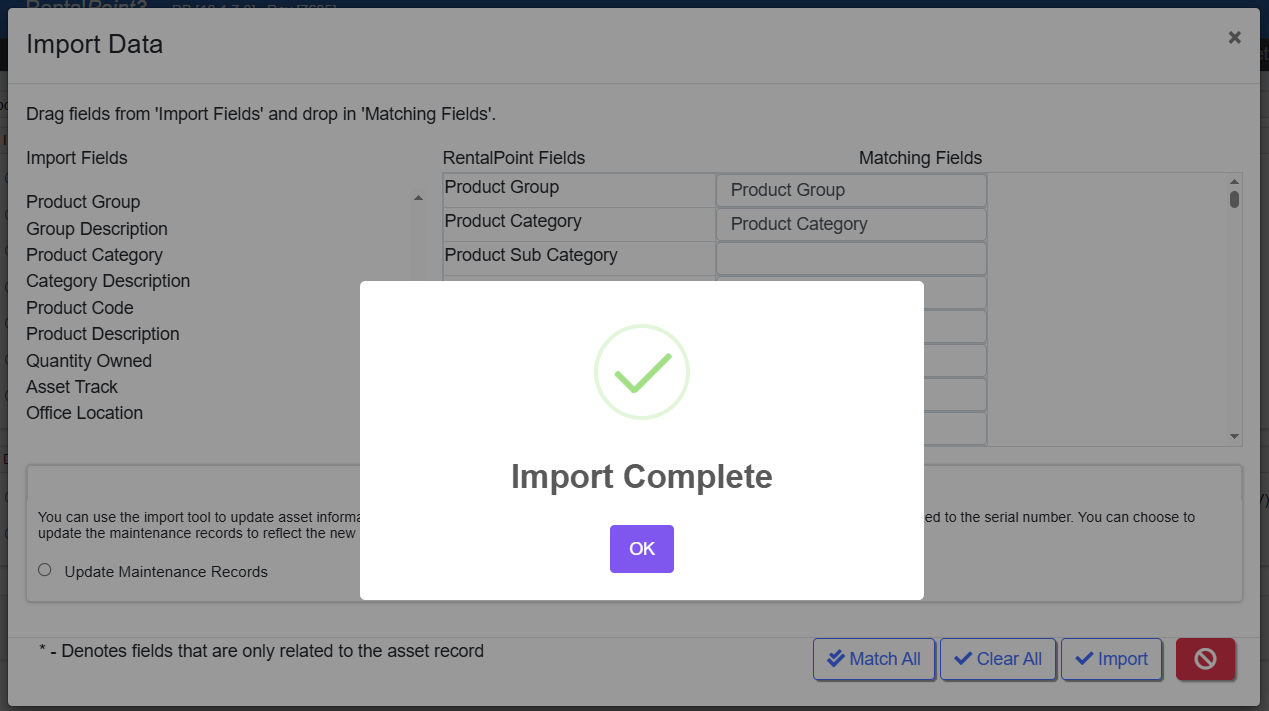
Load the csv file, then click 'Clear All' 'Match All' 'Leave Maintenance Record As Is' and Import
wait to get this message, then click OK
Check your files in Inventory Setup
