Return gear to a single booking, multiple bookings or a project using the Return Booking feature.
 Scan options available for RentalPoint3 include keyboard wedge, bluetooth and in device camera for barcode or QR Code scanning
| From the Mobile App click Warehouse prep
| From the Bookings Control Panel 'Work' menu select the Return [find from barcode] | From the Bookings Control Panel 'Work' menu select the Return Booking option
|


Return Bookings (Step by Step)
Return [Find from Barcode]
Provides direct menu access to the Open Return option with focus on the scan window.
Simply scan the barcode to return and the associated booking will be added to the list.


The Scan Window Explained.....
The scan window opens as a blank slate, ready to receive returns via scanned barcode, serial number or product search. Menu options to the left of the screen are outlined below
 Access other return options from here (Fig 1.1)
 Opens 'Items to Return' window to the left of the scan window (Fig 1.2)
 Displays a list of the bookings included in this open return operation
 Open 'Messages' window to the right of the return window (Fig 1.3)
 Filter return items by product group code (i.e. only show items to scan from the product groups selected)
 Show consolidated list of items for return (Fig 1.4 & Fig 1.5)
Return date – at the top of the window the return date will be applied to all the items returned. This can be changed to reflect the actual date of return as needed. (Fig 1.0)

Fig 1.5
Shows list of consolidated items. Click  again to return to tracked assets list
Filter by Product Groups
Use the  icon to show only products from the selected groups in the return window.
Display Options:
- Check the box to the left of any group to display products to return from that group, then click

 to show the last filter selected
 to display all products for return

 to show the last filter selected
 to display all products for return
List Bookings in this Open Return
From the scan window, use the  icon to display a list of bookings in the current open return.
Use the  option to add more bookings to the list
Use the  icon to the left of each booking to print paperwork as needed


Close the list to return to the scan window.
List Items to Return
From the scan window, use the  icon to display a list of equipment for any booking in the return list.
For Open Return, use the drop down to switch between bookings.


Undo a Return
If the item was returned by mistake, click the  button next to the result to back it out OR click the
  to the left of the asset in the list

Batch Return a list of Barcodes
From the scan window, access the 'batch return option', then copy/paste a list of barcodes into the batch window to return many items at the same time.

Once pasted click  to process the scanned barcodes.
Processed items appear in the scan list with any errors posted to the message board 

Return Items to Maintenance
How to return items to maintenance
Enter Losses against a Booking
Access from the Work menu on the Booking Grid
Or from within the Booking Return Window
- Select the charging option for the lost items
- Select the items that will be marked as Lost
- Save the return

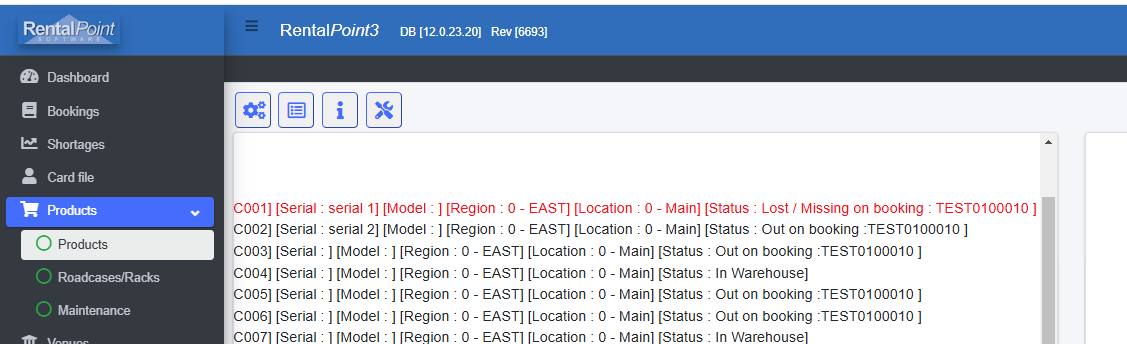
Loses will be recorded in the booking under 'Losses and Breakages' heading
And the item will be recorded as LOST in inventory

Note:
- If a sub rented item is entered as a loss, the item will be added with the sale price but will be muted from the warehouse and will not be checked out as a sale.
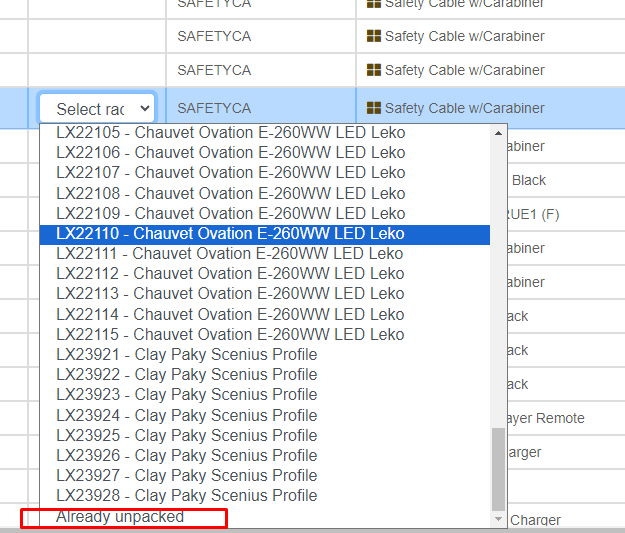
- When entering a non-tracked items packed in a rack as a loss, the rack to unpack the item from will be automatically selected UNLESS the same non-tracked item is packed in multiple racks. In this case the rack to unpack the item from must be selected. If the item was already unpacked, select the last item in the drop down (screenshot below)

When a Lost/Sold Item is Scanned for Return
Functionality here depends on your company's settings for Barcode Parameter #40
If Barcode 40 is set to: Prevent Return of Asset to Stock
- Lost items cannot be returned via the return window. Users should process return of these items manually in inventory setup.
If Barcode 40 is set to: Return Asset to Stock
- When enabled, scanning a sold, lost, stolen or written off asset in the return window will update the asset disposal type to ‘Active’
- The secondary parameter setting will determine if the asset will be set to 'In Service'
- Only allow return of assets associated with bookings = The asset must be checked out to the current booking in order to be placed 'in service' and available for other bookings
- No, always return to stock = Asset will be placed 'In Service' regardless of what booking the asset is returned to
When a disposed asset is scanned, it will be identified to the user and actioned according to the parameter settings explained above.
 Non tracked (non barcoded) inventory cannot be returned in an open session unless it is packed in a rack/ road case
Error Messages
Error messages can be displayed to the right of the scan window using the  icon
icon
From the message window click  to clear and save your list to the data\Error Lists folder (as defined in your RentalPoint installation)

Alternatively, save and attach your error lists to each booking on completion of your return session using the checkbox in the final Print Window

Use Open Return Option to Change Asset Location
Any asset can be scanned into the return window to move it to the current location. The asset does not need to be on any booking, however the user will be prompted to confirm the action.
Alternatively, use the batch scan option to move a list of assets to the current warehouse without confirmation prompts.

Once confirmed using  the asset will be added to the top of the scan list
Return Asset to Maintenance
From the scan window, access the  option,

then enter maintenance details for the asset and click  to save.

The asset will be flagged as entered to maintenance in the scan list

Extend a Booking
For bookings where some gear will stay on site for a longer period, you may 'final return' the original booking and extend all 'out' items to a new booking. Users may wish to do this if extra costs will be invoiced separately for the extended gear.
** See end of this section for parameters controlling this feature **
Access the EXTEND option from within the Return Window.

The booking below will be final returned so that a new booking will be created to track the remaining 'out' gear.

If you try to Final Return a booking that does not have all of it's items returned, you will be prompted with an option to extend all OUT gear to a new booking.

Alternatively, access the Extend option from the Scan Menu


All OUT items have been returned to the original booking and checked out to MYTEST00093

The booking grid shows the origin of the extended booking. In the example below, the original booking was MYTEST00092
Note: Edit the new booking to confirm pricing. If the extended item was part of a package, pricing may need to be altered on the extended booking.

Parameters controlling this feature are:
- Barcode Parameter 27 ‘Prompt for Extending Booking on Final Return’

- Operational Parameter 22 – ‘Return date for Extension Booking’ When Checked, the user will be prompted to set a return date for the extended booking.


Access via:


Once set, reload Software Settings (all users must be logged out first)

Operator Privileges
Access off the main menu via Setup-->Operators, then edit the operator group and click the 'Checkout,Return and Maintenance' tab
Take a few minutes to read through the privileges below for late, unused equipment, sales auto returns etc.
Check the box beside all options you want to grant privileges for, then save and restart RentalPoint before proceeding.