RentalPoint uses an INVENTORY TREEVIEW structure to organize and manage the inventory your company will make available for Rental/ Sale. Please take a few minutes to understand the treeview concept above before proceeding with set up.
Group
First Access Inventory Setup, then....
Create a new Rental group via option when the
  icon is highlighted
Create a new Sales group via option when the  icon is highlighted
Open existing group properties via  option when the existing group is highlighted
Delete an empty group via  option when the empty group is highlighted

Category
First Access Inventory Setup, then....
Create a new category via option when any existing category is highlighted
Open existing category properties via option when the existing category is highlighted
Delete an empty category via option when the empty category is highlighted

Product
First Access Inventory Setup, then....
Create a new product via option when any existing Product is highlighted
Open existing product properties via option when the existing product is highlighted
Delete a product via option when the existing Product is highlighted (all assets, components, accessories and alternatives must be deleted first before the product can be deleted.)
Duplicate an existing product via  option when the existing product is highlighted

Use the  option to search for an existing Group/Product/Asset per screenshot below

Components
Components are parts that go out with the product in question. There is no extra cost associated with these items since they are deemed to be part of the main product being shipped.
To add a component to a product you can either cut and paste or drag and drop an EXISTING product to the Components folder of the product you are setting up.

To edit the component setting, click the properties option
Quantity
- Will usually change according to the package/main product quantity
- When set to 0 (zero), the component quantity will always remain at 1
- For less component products than the main item, use a decimal value.
- Eg: a quantity of 0.1 will set the component quantity on the equipment grid to 1 until the package/main product quantity exceeds 10. (see further illustrations under accessories below)
Components can be set up as optional or mandatory
- Optional components will be offered when the main product is being added to the booking.
- Mandatory components and selected optional components are added to the equipment grid the same time as the main product.
Include components for this component
- Enable this option to add the item’s components as part of the product.
- For example, the monitor has a cable component. To ensure it's included as part of the package the 'include components for this component' is checked


Accessories
Accessories are products that may be shipped with your main product that are NOT included in the price of the main product; i.e. they are charged separately.

To add an accessory to a product you can cut and paste or drag and drop and EXISTING product to the Accessories folder of the product you are setting up.

Quantity
- For a 'one time only' accessory, set the accessory quantity to 0. The accessory quantity will remain as 1 even when the main product quantity is increased
- For a 1:1 ratio with the main product, set the accessory quantity to 1. The accessory quantity will equal the main quantity when added to the equipment grid
- For a 20:1 ratio for example, set the accessory quantity to .05 (where .05*20 = 1). The accessory quantity will then be set as a multiple of the main quantity.
- Main Product Qty 1-20 --> Accessory Qty 1
- Main Product Qty 21-40 -->Accessory Qty 2
- Maint Product Qty 41-60 --> Accessory Qty 3
Include accessories for the accessory
- Enable this option to add the item’s components as part of the product
- When checked if the product MONCOV has components they will be included as part of the accessory
Alternatives
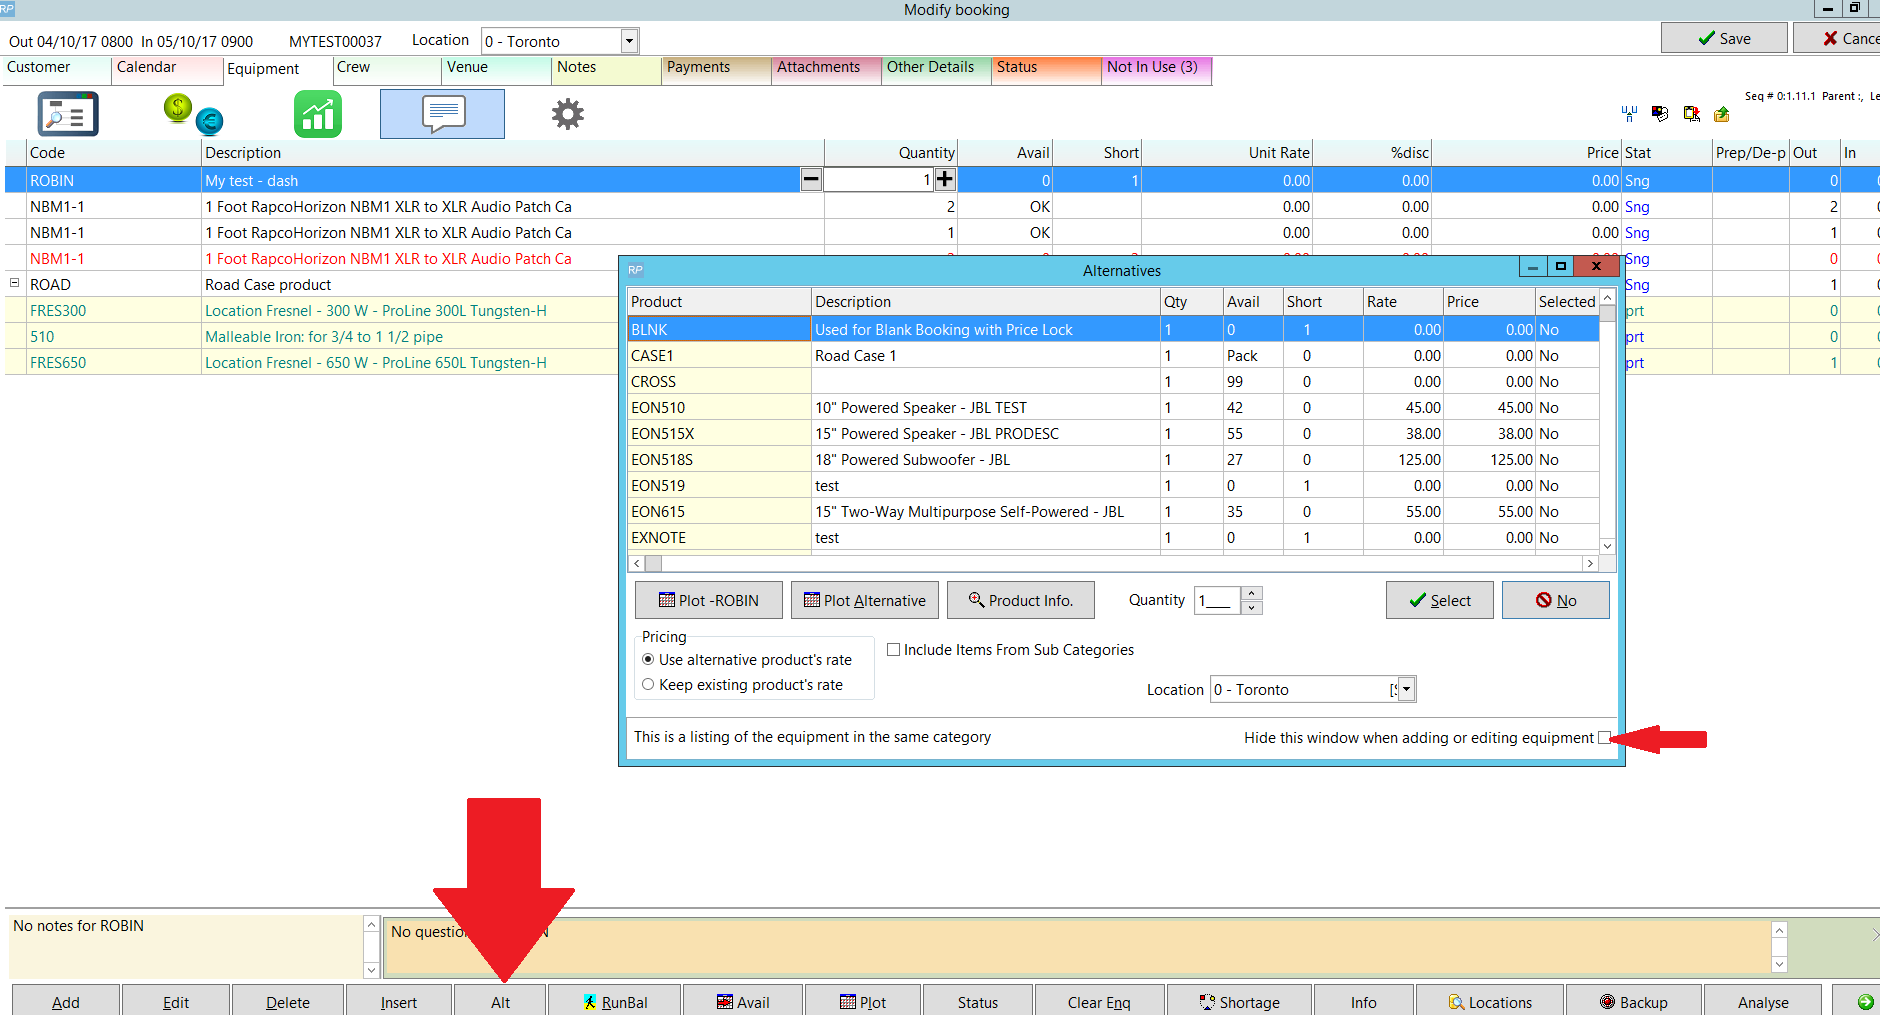
Alternatives are suggested to the user when the main product is short. For example, when adding a product to a booking, the software anticipates a shortage for that item, the alternatives list will display allowing the user to select an approved alternative in its place.
To add an alternative to a product you can either cut and paste or drag and drop an EXISTING product to the Alternatives folder of the product you are setting up. Below, when the 25" monitor is short the user will have the option to use MON32 in it's place.

Parameters affecting Alternatives
- Operational #18 'Alternative Pricing Default'
- Operational #54 'List Category as Alternative'
Alternative Product Popup
To see alternatives to the product highlighted on your equipment grid, click on the 'Select Alternative' option from the work menu.


Asset
First Access Inventory Setup, then
Create a new asset for Rental products via option when any existing Asset is highlighted (or highlight the asset folder)
Open existing asset properties via option when the existing Asset is highlighted
Delete existing assets via option when the existing Asset is highlighted
